
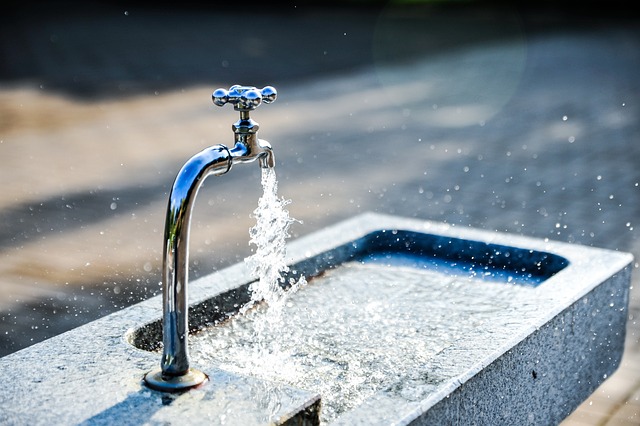
A leaky faucet may seem minor, but it causes water waste and higher bills. To fix it, gather essential tools, turn off the water supply, disassemble the faucet, replace damaged washers or O-rings, then reassemble and test for leaks. Our step-by-step guide teaches you "How to Fix a Leaky Faucet" efficiently.
Don’t ignore that dripping faucet—it’s not just a petty nuisance but a potential water waster. Learn how to fix a leaky faucet with our comprehensive guide, covering everything from understanding the problem to gathering the right tools and materials, and culminating in a step-by-step repair process. By following these simple instructions, you can save money on your water bill and contribute to conservation efforts. Say goodbye to that persistent drip and master the art of fixing a leaky faucet today!
- Understanding the Problem: Identifying a Leaky Faucet
- Gathering the Right Tools and Materials for Repair
- Step-by-Step Guide to Fixing a Leaky Faucet Effectively
Understanding the Problem: Identifying a Leaky Faucet
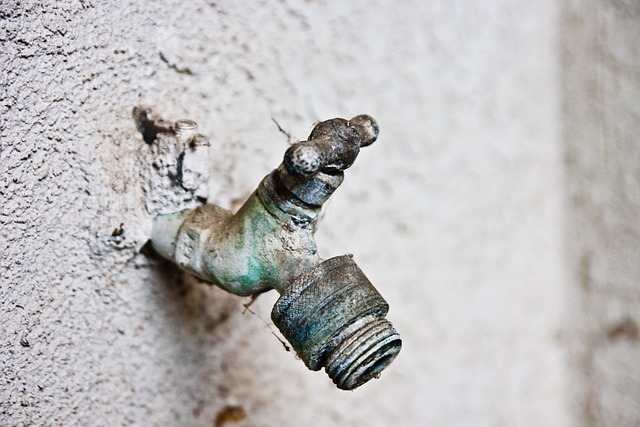
A leaky faucet might seem like a minor inconvenience, but it can lead to significant water waste and higher than expected water bills. Understanding how to identify a leaky faucet is the first step in fixing the problem effectively. Keep an eye out for dripping water from the faucet handle or spout, as this is often the most noticeable sign. Sometimes, the leak might be less apparent, manifesting as a continuous, slow drip that goes unnoticed until it adds up to substantial waste over time.
If you notice any of these signs, it’s time to investigate further. Check both the hot and cold water supplies connected to the faucet. A leaky faucet could be due to worn-out O-rings or washer seals inside the faucet mechanism. By learning How to Fix a Leaky Faucet, you not only save money but also contribute to preserving our precious water resources.
Gathering the Right Tools and Materials for Repair

Before you begin fixing that leaky faucet, make sure you have the right tools and materials on hand. This typically includes a wrench or pliers for gripping the faucet’s components, a new washer or O-ring (the primary culprit in most leaks), and possibly some pipe tape or a thread sealant to ensure a secure fit. Other essentials could be an adjustable or combination wrench set, a screwdriver, and an old towel to catch any drips. Gather everything you think you’ll need before starting the repair process – it will save time and frustration later on.
Having the right tools is only half the battle when learning how to fix a leaky faucet. Knowing which parts of your faucet are vulnerable to leaks is crucial, too. Familiarize yourself with its various components – cartridge, handle assembly, base, and spout – so you can easily identify where the leak is originating from. This knowledge will help guide your repairs and ensure you’re addressing the root cause of the problem, not just temporarily fixing a drip.
Step-by-Step Guide to Fixing a Leaky Faucet Effectively
Fixing a leaky faucet might seem like a daunting task, but with a simple step-by-step approach, it can be easily accomplished. First, gather all the necessary tools: adjustable wrenches, pliers, and a replacement washery or O-ring (depending on your faucet’s design). Turn off the water supply to prevent leaks during the process. Then, disassemble the faucet by removing the handle and spout. Identify the source of the leak, which is often the washer or O-ring. Once located, carefully remove the damaged part and install the new one, ensuring proper alignment. After reassembling the faucet, test its functionality by turning on the water supply and checking for any leaks. If the leak persists, double-check your work and tighten any loose connections.
A leaky faucet may seem like a minor inconvenience, but addressing it promptly is key to avoiding higher water bills and potential damage. By understanding the problem, gathering the right tools, and following a step-by-step guide, you can fix that drip effectively. Don’t ignore it—take control and save both water and money with this simple DIY solution.