A leaky faucet may signal minor or complex plumbing issues. Understanding the leak's source and severity determines whether DIY fixes (like washer or O-ring replacement) or professional help are needed. Our guide provides a step-by-step process for DIY repairs, emphasizing tool gathering, shutting off water supply, disassembling and inspecting the faucet, replacing worn parts, cleaning threads, reassembling carefully, and testing for leaks after fixing.
Tired of that persistent drip, drip, drip? You might be wondering, “DIY or call a plumber?” The answer could be simpler than you think! This guide walks you through understanding and fixing a leaky faucet. From identifying the problem to gathering the right tools, we’ll equip you with the knowledge to tackle this common household issue. Learn the step-by-step process to fix your leaky faucet and save money – no plumber needed!
- Understanding the Problem: Identifying a Leaky Faucet
- Tools and Materials Required for Repairs
- Step-by-Step Guide to Fixing a Leaky Faucet
Understanding the Problem: Identifying a Leaky Faucet

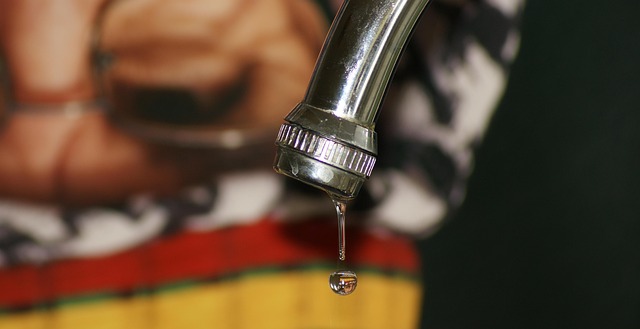
A leaky faucet might seem like a minor inconvenience, but it’s often an early sign of a deeper issue within your plumbing system. Understanding how to identify this problem is the first step in knowing whether to tackle it yourself or call in a professional plumber.
When you notice water dripping from your faucet, especially after turning it off, it’s a clear indication of a leak. Keep an eye on the rate of leakage; if it’s a slow drip, it might be an easily fixable issue like a worn-out washer or O-ring. However, if the leak is substantial, leading to water waste and potential damage to your countertops or flooring, it could signal a more complex problem with the faucet mechanism or even the pipes beneath.
Tools and Materials Required for Repairs
Before tackling any DIY project, ensuring you have the right tools and materials is crucial for a successful repair, especially when fixing a leaky faucet. Gather the following essentials: adjustable wrenches for tightening or loosening components, pliers for gripping and bending, a new washer and O-ring (or a replacement cartridge if needed), and some plumber’s tape for sealing connections. Additionally, have a bucket handy to catch any water that might spill during the process. With these tools and materials, you’ll be well-equipped to follow step-by-step guides and, ultimately, fix that leaky faucet efficiently.
Step-by-Step Guide to Fixing a Leaky Faucet

Step-by-Step Guide to Fixing a Leaky Faucet
1. Turn Off the Water Supply: Before beginning, shut off the water supply to your faucet. Locate the valve under the sink or in the basement and twist it clockwise to stop the flow. This prevents any additional water from leaking while you work.
2. Gather Tools and Parts: You’ll need a few basic tools: a wrench or pliers for loosening pipes, new O-rings or washer (depending on your faucet’s design), and possibly some thread seal tape. Gather these and have them handy as you disassemble the faucet.
3. Remove the Faucet Handle: Unscrew and remove the faucet handle and any decorative caps. This usually involves twisting a small screw or lifting a lever. Be sure to mark the position of each part for easy reassembly later.
4. Dismantle the Faucet: Next, you’ll need to take apart the faucet itself. The process varies by faucet model, but typically involves removing the stem and then the O-ring or washer. Inspect these parts for damage; if they’re worn, that’s likely why your faucet was leaking.
5. Replace Worn Parts: If your O-ring or washer is damaged, replace it with a new one of the correct size. Clean the threads where the stem meets the faucet body and apply a thin layer of thread seal tape to prevent leaks at this joint.
6. Reassemble the Faucet: Put the stem back in place, ensuring it’s properly aligned. Reattach the handle and decorative pieces, securing them with their respective screws or levers.
7. Turn On the Water Supply: With everything reassembled, turn on the water supply valve and check for leaks. If the faucet still drips, double-check your connections and replace any parts that didn’t seal properly.
When faced with a leaky faucet, whether you choose to DIY or call a plumber depends on your comfort level and the severity of the issue. For minor leaks, many homeowners can successfully fix them using simple tools and our step-by-step guide. However, for more complex issues, it’s often best to rely on a professional plumber to ensure long-lasting repairs. Remember, prompt action can prevent further damage and water waste, making it a wise decision to tackle this common plumbing problem head-on. Learn how to fix a leaky faucet today and take control of your home’s water efficiency.