
Leaky faucets waste water, increase bills, and can cause plumbing damage. Recognize a leak by looking for continuous dripping or unusual noises. Fix a leaky faucet with simple DIY steps: turn off water supply, gather tools, disassemble, replace worn parts like O-rings, reassemble, seal threads. Prevent water waste through regular faucet maintenance & install low-flow aerators. Save hundreds of gallons of water annually by learning How to Fix a Leaky Faucet.
Tired of seeing your water bill rise due to a pesky dripping faucet? Understanding how to fix this common issue is not only cost-effective but also an eco-friendly step towards water conservation. This article guides you through the process of identifying and repairing a leaky faucet, offering a simple, step-by-step approach. Learn to navigate this DIY task effectively, saving money and minimizing water waste. By implementing these tips, you’ll be well on your way to stopping unnecessary water drainage.
- Understanding the Problem: Identifying a Leaky Faucet
- The Step-by-Step Guide to Fixing It
- Preventive Measures: Long-Term Solutions for Water Conservation
Understanding the Problem: Identifying a Leaky Faucet
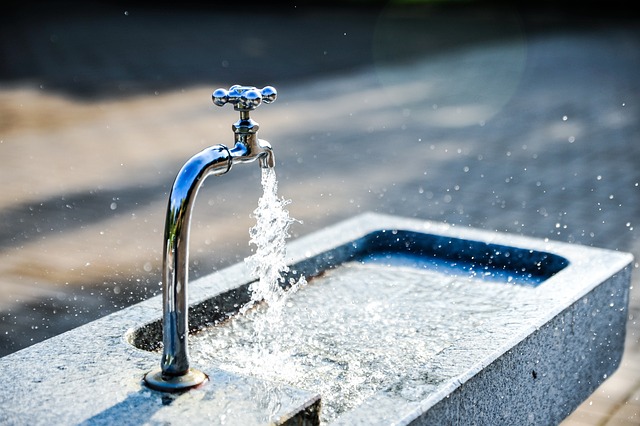
Leaky faucets are a common household issue that can waste significant amounts of water over time, leading to higher water bills and potential damage to your plumbing. Identifying a leaky faucet is the first step towards fixing the problem. Often, it’s not difficult to recognize; you’ll notice water dripping from the faucet or running continuously, even when it’s turned off. This persistent moisture can be seen either as visible drips or as a steady, subtle stream that adds up over minutes.
If you suspect a leak, examining the faucet closely is essential. Look for signs of damage or corrosion, especially around the base and where the faucet connects to the pipes. You might also feel for any unusual warmth indicating increased water pressure or detect strange noises suggesting internal issues. Understanding these symptoms will help guide your approach when it’s time to learn how to fix a leaky faucet.
The Step-by-Step Guide to Fixing It

Fixing a dripping faucet is an easy, DIY project that can save you money and help conserve water. Here’s a step-by-step guide to tackling this common issue:
1. Turn off the water supply: Before beginning any repairs, shut off the valves under the sink to stop the water flow. This prevents leaks during your fix. You’ll need to locate the valves – they’re usually two small handles near the base of the faucet. Twist them clockwise until they’re fully closed.
2. Gather your tools: You’ll need just a few basic tools for this repair: adjustable wrench or pliers, new O-rings (or washer if needed), and thread sealant (also known as plumber’s putty). These items are readily available at any hardware store. Don’t forget to lay down some rags on the counter to catch any excess water.
3. Disassemble the faucet: With the water turned off, use your tools to carefully remove the faucet handle and any decorative caps or covers. Next, unscrew the stem from the faucet body using your wrench or pliers. This may require some force, so be cautious not to damage the parts.
4. Inspect and replace faulty parts: Once disassembled, examine each component for wear and tear. The O-rings are often the culprit behind leaks – they can become damaged or hardened over time. If the O-rings look old or worn, replace them with new ones. If you find the washer is damaged, it should also be replaced.
5. Reassemble and seal: After replacing the faulty parts, carefully reassemble the faucet in reverse order of disassembly. Ensure each part is securely fastened. Finally, apply a thin layer of thread sealant around the threads where the stem connects to the faucet body. This will create a watertight seal and prevent future leaks.
Preventive Measures: Long-Term Solutions for Water Conservation

Preventing water waste is an effective long-term solution for conservation. One of the most straightforward ways to achieve this is by addressing leaky faucets. A dripping faucet may seem like a minor inconvenience, but it can lead to significant water wastage over time. Regular maintenance and timely repairs are crucial in reducing water consumption.
Learning how to fix a leaking faucet is an easy task that every homeowner should undertake. It involves inspecting the faucet for any visible damage or wear and replacing worn-out parts like O-rings or cartridges. This simple step can save hundreds of gallons of water annually. Additionally, installing low-flow aerators on faucets can further reduce water usage without compromising performance.
Dripping faucets aren’t just an inconvenience; they’re a waste of precious water. By learning how to fix a leaky faucet, you can make a significant impact on both your utility bills and the environment. Implement the preventive measures discussed for long-term conservation, ensuring that every drop counts. With a few simple steps, you can stop wasting water and contribute to a more sustainable future.