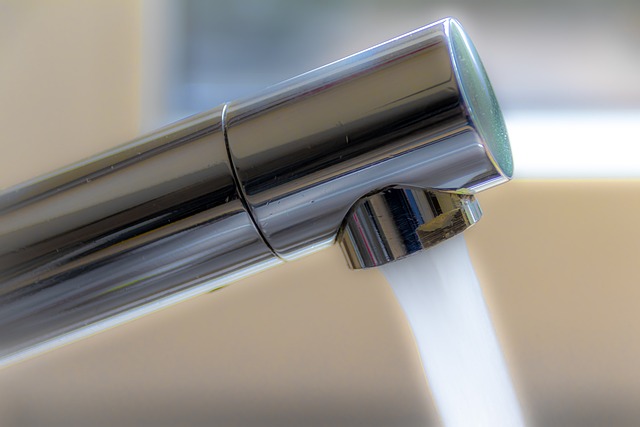
DIY pipe insulation is an affordable and effective way for homeowners to reduce energy costs and prevent frozen pipes. Essential materials include insulated pipes, foam insulation (polyisocyanurate or fiberglass), duct tape, scissors, and a utility knife. Select materials matching pipe size and application. Foam insulation provides excellent thermal resistance, and proper cutting tools ensure precise installations. By insulating exposed pipes in attics, basements, or outside walls, homeowners can ease heating system load in winter and avoid excessive cooling costs in summer, while also protecting against frost damage. Regular checks and high-quality materials are crucial for optimal energy efficiency.
Keep your home cozy and your energy bills low with this guide to DIY pipe insulation. Learn how adding insulation to your pipes can prevent temperature loss, reduce heating and cooling costs, and decrease energy consumption. This article provides a step-by-step process using accessible materials and tools, empowering you to effectively insulate your pipes at home. Discover long-term savings and essential maintenance tips for sustained efficiency. Boost your DIY skills and start saving today with DIY pipe insulation!
- Understanding DIY Pipe Insulation: Materials and Tools Needed
- Step-by-Step Guide to Effectively Insulate Your Pipes at Home
- Long-Term Savings and Tips for Maintaining Your Insulated Pipes
Understanding DIY Pipe Insulation: Materials and Tools Needed

DIY pipe insulation is a cost-effective and simple project for homeowners looking to reduce energy bills. To get started, gather the necessary materials and tools. Common choices include insulated pipes, foam insulation (like polyisocyanurate or fiberglass), duct tape, scissors, or a utility knife, and possibly a heat gun for faster installation. For an efficient DIY job, select materials that match your pipe size and intended application. Insulated pipes come in various diameters, so measure your existing pipes accurately to choose the right fit.
Foam insulation is lightweight yet robust, offering excellent thermal resistance. It can be cut to specific lengths and wrapped around pipes for a tight seal. Duct tape secures the foam, creating a protective barrier against temperature loss or gain. Proper cutting tools are essential for precise installations, ensuring the insulation fits seamlessly without compromising effectiveness.
Step-by-Step Guide to Effectively Insulate Your Pipes at Home

Insulating your pipes is a straightforward and cost-effective way to lower your energy bills and prevent frozen pipes during cold months. Here’s a step-by-step guide for effective DIY pipe insulation at home:
1. Identify the Pipes to Insulate: Start by locating the pipes you want to insulate, typically those exposed in attics, basements, or outside walls. Check for water supply lines, drainage pipes, and heating/cooling system pipes.
2. Gather Materials: You’ll need pipe insulation (available in foam, fiber glass, or rubber), a utility knife, tape measure, scissors, and possibly heat-resistant tape or sealant. Choose insulation based on the type of pipe and your climate.
3. Measure and Cut Insulation: Measure the length of each pipe segment you want to insulate. Using the utility knife, cut the insulation material to fit precisely around the pipes, ensuring a tight seal. For curved pipes, wrap the insulation and secure with tape or sealant before cutting.
4. Install the Insulation: Remove any protective shielding on the pipes if necessary. Slip the insulated pipe covers over the pipes, pressing them firmly in place. Ensure there are no gaps for air to circulate, which could negate energy savings.
5. Secure with Tape/Sealant (if needed): For extra peace of mind, especially in colder climates, use heat-resistant tape or sealant to reinforce the joints and seal any gaps around the insulation.
Long-Term Savings and Tips for Maintaining Your Insulated Pipes
Investing in DIY pipe insulation isn’t just a one-time cost-saver; it’s a long-term strategy to keep your energy bills down and your home comfortable. Over time, properly insulated pipes prevent heat loss during colder months, reducing the workload on your heating system. Conversely, during hotter seasons, they keep water cool, averting excessive cooling costs. This simple yet effective measure can lead to significant energy efficiency improvements.
To maintain your insulated pipes and maximize savings, regular checks are essential. Ensure there’s no visible damage or signs of wear and tear. In colder climates, insulate pipes even further to avoid freezing, using products designed for sub-zero temperatures. For DIY enthusiasts, keeping a stock of high-quality insulation materials and tools will make repairs or additional installations more convenient. Regular maintenance not only extends the life of your insulation but also guarantees it continues to deliver optimal energy efficiency.
DIY pipe insulation isn’t just an effective way to reduce energy costs; it’s also a straightforward project that can be completed with minimal tools and materials. By following the step-by-step guide provided, you can ensure your pipes are well-insulated for years to come. The long-term savings on your heating and cooling bills will make this simple task an excellent investment for any homeowner. Remember, proper insulation is key to maintaining efficient plumbing systems, so take the time to do it right!