
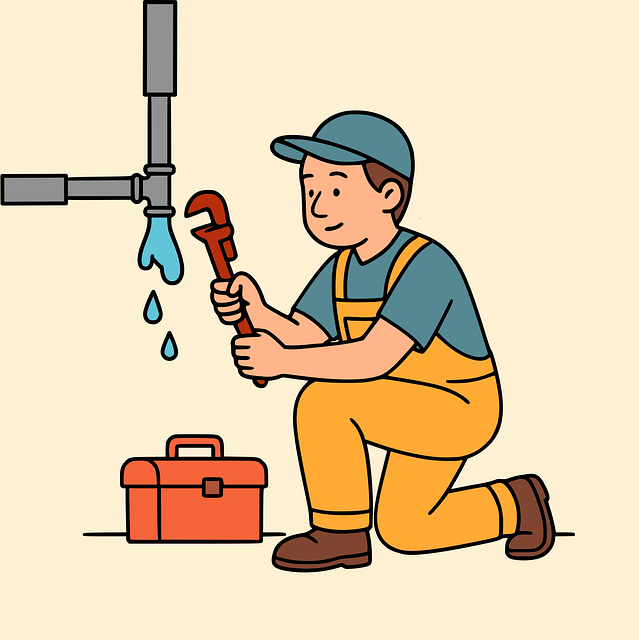
A leaky faucet, caused by worn washers or O-rings, wastes water and raises utility bills. To fix it, gather essential tools like an adjustable wrench, new washer, and plumber's tape (or replacement cartridges for modern faucets). First, turn off the water supply, disassemble the faucet, replace the faulty parts, test for leaks, then reassemble. Following these simple steps from our guide "How to Fix a Leaky Faucet" efficiently repairs the issue.
Tired of seeing your water bill rise due to a leaky faucet? It’s time to take control and stop wasting water. This step-by-step guide will teach you how to fix a leaky faucet easily and cost-effectively. First, identify the problem by checking for consistent dripping or a slow drip that might go unnoticed. Then, gather the necessary supplies like pliers, replacement washer or O-ring, and a bucket. Follow these simple steps to repair your faucet and start saving water today!
- Understanding the Problem: Identifying a Leaky Faucet
- Gathering Supplies and Tools for Repair
- Step-by-Step Guide to Fixing a Dripping Faucet
Understanding the Problem: Identifying a Leaky Faucet
A leaky faucet is often an overlooked yet significant water waster in your home. It may start as a subtle drip, almost imperceptible at first, but over time, these small drops can add up to a substantial amount of wasted water—and money on your utility bills. Understanding how and why faucets leak is the first step towards fixing them.
When you notice a continuous dripping from the faucet, it’s usually an indication that there’s a problem with one or more components inside. The most common culprit is a worn-out washer or O-ring—small seals that control water flow. Over time, these parts can degrade, allowing water to escape. How to Fix a Leaky Faucet involves identifying the specific issue and replacing the faulty part(s).
Gathering Supplies and Tools for Repair
Before you begin repairing your leaky faucet, make sure you have all the necessary supplies and tools at hand. The essentials include an adjustable wrench or pliers for gripping and turning parts, a new washer or O-ring (often included with your faucet kit), and some plumber’s tape or pipe compound to ensure a secure seal. These simple tools will help you complete the repair process effectively.
When selecting your parts, ensure they are compatible with your faucet model. Many modern faucets come with easy-to-install replacement cartridges that include all necessary gaskets and seals. Always double-check the instructions provided by the manufacturer for a hassle-free fixing experience, making sure you’re confident in how to fix a leaky faucet before beginning the repair.
Step-by-Step Guide to Fixing a Dripping Faucet
Fixing a dripping faucet is an easy, DIY project that can save you money and help conserve water. Here’s a step-by-step guide to tackling this common home repair:
1. Turn off the Water Supply: Before beginning any repairs, it’s crucial to stop the water flow. Locate the shutoff valves under your sink, twist them clockwise until they’re firmly closed. This prevents water from leaking out while you work and makes fixing the faucet much safer.
2. Gather Your Tools: You’ll need a few basic tools for this task: adjustable wrench or pliers for gripping tight fittings, a new washer (check your old one for wear and tear), and a bucket to catch any drips.
3. Disassemble the Faucet: Remove the faucet handle with your tool of choice. This usually involves unscrewing a small screw at the base of the handle. Next, twist off the faucet stem by turning it counterclockwise. You should now be able to pull out the old washer and inspect the faucet’s inner components.
4. Replace the Washer: If you’re lucky, replacing the washer is as simple as inserting a new one in place of the worn-out one. Ensure it fits properly between the stem and the valve seat. Tighten the stem back into place by hand first, then use your tool to secure it firmly but not excessively.
5. Test for Leaks: Turn on the water supply and observe if there are any leaks at the joints or around the washer. If there are none, you’ve successfully fixed your leaky faucet!
Fixing a dripping faucet isn’t just an effective way to stop water wastage; it’s also a straightforward DIY task that can save you money on your water bills. By following these simple steps, you can quickly address the issue and enjoy a leak-free, efficient flow from your faucets. Remember, every drop counts, and taking action to fix leaks makes a significant difference in our efforts to conserve this precious resource.